Showing posts with label Clean. Show all posts

TIDE WASHING MACHINE CLEANER REVIEW!!!

Every once in a while I receive an email asking me to do a review on a certain product, so I try to oblige. 

This last email I received asked me to review the Tide Washing Machine Cleaner.

Here is what it claims:

Tide Washing Machine Cleaner fights odor-causing residues in your washer from laundry soils, detergents and water hardness minerals. It helps fight and lift odor-causing residues as it freshens for a clean, fresh washer.

How it works:

1. Fights odor-causing residues with a powerful oxygenated bleach system that gets the source of the odor.
2.Penetrates & lifts away residues and deposits from the surface in your washer with specially designed surface active ingredients.
3.Freshens your washer, while leaving behind a crisp, clean scent.

How to use it:

For best results on HE and standard machines:

1. Remove clothing from your washer.
2. Add 1 pouch of Tide Washing Machine Cleaner directly into your drum, {The box says to add it to your laundry soap dispenser, but the website says to add it to the drum. It clumps in the dispenser and doesn't really work well.}.
3. Run a normal cycle, selecting the hot water option.
4. Use once a month to help keep your machine smelling clean and fresh.


My review:

My front load washer was just starting to smell. But once it hit, man did it stink. The directions state to use 1 pouch of Tide Washing Machine Cleaner per week for 3 consecutive weeks. Afterwards, continue on just 1 pouch per month as part of your washer’s regular maintenance. So, I decided to by the 5 pack at Walmart for $12.

It took me a month, but in the end... the drum still smelled. And not that great either. 

It did smell better, but after using 5 packets, it wasn't what I thought it should be. 

Why do you need to clean your HE washer?

HE washers today use less water than traditional washers, which can lead to residues from laundry soils, detergents and water hardness mineral being left behind in areas you can’t see. Proper care of your machine, which includes monthly cleaning, helps keep odor-causing residues from causing odor problems down the road.

What else works?

So, here is what I did. Remember my posts on cleaning with vinegar, here and here, and baking soda, here?

I do my laundry all in one day. I always remove my load immediately after it's over. I know. Easier said than done in some situations. But, with a little training, it can become a habit. I try really hard not to start a load of laundry if I can't remove it within 5 minutes. After I finish the last load of wash, I take some paper towels and I wipe down everything... the drum, the door, the detergent cups, inside of the rubber door seal... EVERYTHING!

I leave the door open to my washer to allow any other water and moisture the chance to evaporate.

 Then this is what I did and continue to do on a monthly basis. I add a cup of Distilled White Vinegar & 1 Cup of Baking Soda (adding both neutralizes the pH but the bubbling action gently scrubs any debris you can’t get to inside the drum) directly into the drum and use HOT water for washing. Then, I add about ½ cup of vinegar into the fabric softener compartment and ½ cup of baking soda into the detergent compartment. I don’t have a “Cleaning Cycle” as some machines do so I set the wash on “Quick Wash” with HOT water and High Spin Cycle.

Finally, I clean the drain pump filter. This should be done about every two weeks. If the drain pump filter gets clogged with debris, the water flow will slow down, and fill up with stinky water over time. Old water that doesn’t drain sits here, as does lint and other odd items. The drain pump filter is usually located at the front bottom of the washer. Always refer to your washer manual as different machines have different instructions but the bottom line is that it needs to be cleaned out so that water doesn’t sit in the pump.

I don't have an odor problem anymore.


25 USES FOR HYDROGEN PEROXIDE!!!

I recently started Hydrogen Peroxide in my cleaning. I've begun using it to remove armpit stains in my white shirts and cleaning my kitchen counters.


This stuff is A-MA-ZING! It's very versatile! And it's a very cheap alternative to high priced cleaning products!

I started looking for some other ways I could use it around my home.

Here is what I found out...

What is it?

Hydrogen peroxide should really be called oxygen water, since it is basically the same chemical make up as water but with an extra oxygen atom (H2O2). Because of this it breaks down quickly and harmlessly into oxygen and water.

Some interesting facts about hydrogen peroxide:
  • It is found in all living material.
  • Your white blood cells naturally produce hydrogen peroxide (H2O2) to fight bacteria and infections.
  • Fruit and vegetables naturally produce hydrogen peroxide. This is one of the reasons why it is so healthy to eat fresh fruit and vegetables.
  • It is found in massive dosages in the mother’s first milk, called colostrum, and is transferred to the baby to boost their immune system.
  • It is found in rain water because some of the H20 in the atmosphere receives an additional oxygen atom from the ozone (O3) and this H2O2 makes plants grow faster.
What does it do?


1. Use 1 pint of 3% hydrogen peroxide to a gallon of water to clean humidifiers and steamers.


2. In the dishwasher, add 2 oz. to your regular detergent for a sanitizing boost. Also, beef up your regular dish soap by adding roughly 2 ounces of 3% H2O2 to the bottle.

3. Clean kids’ toys and play areas. Hydrogen peroxide is a safe cleaner to use around kids, or anyone with respiratory problems, because it’s not a lung irritant. Spray toys, toy boxes, doorknobs, and anything else your kids touch on a regular basis.


4. Clean your cutting board and countertop. Let everything bubble for a few minutes, then scrub and rinse clean.

5. Wash vegetables and fruits with hydrogen peroxide to remove dirt and pesticides. Add 1/4 cup of H2O2 to a sink of cold water. After washing, rinse thoroughly with cool water.


6. Wipe out your refrigerator and dishwasher. Because it’s non-toxic, it’s great for cleaning places that store food and dishes.

7. Use it to remove ear wax. Use a solution of 3% with olive or almond oil. Add a couple drops of oil first then H2O2. After a few minutes, tilt head to remove solution and wax.


8. Clean your sponges. Soak them for 10 minutes in a 50/50 mixture of hydrogen peroxide and warm water in a shallow dish. Rinse the sponges thoroughly afterward.


9. Soak your toothbrush in hydrogen peroxide between uses to keep it clean and prevent the transfer of germs. This is particularly helpful when you or someone in your family has a cold or the flu.


10. Whiten bathtub grout. First dry the tub thoroughly, then spray it liberally with hydrogen peroxide. Let it sit — it may bubble slightly — for a little while, then come back and scrub the grout with an old toothbrush. You may have to repeat the process a few times.

11. Clean the toilet bowl. Pour half a cup of hydrogen peroxide into the toilet bowl, let stand for 20 minutes, then scrub clean.

12. Remove baked-on crud from pots and pans. Combine hydrogen peroxide with enough baking soda to make a paste, then rub onto the dirty pan and let it sit for a while. Come back later with a scrubby sponge and some warm water, and the baked-on stains will lift right off.


13. Remove stains from clothing, curtains, and tablecloths. Hydrogen peroxide can be used as a pre-treater for stains — just soak the stain for a little while in 3% hydrogen peroxide before tossing into the laundry. 

14. You can also add a cup of peroxide to a regular load of whites to boost brightness. It’s a green alternative to bleach, and works just as well.


15. Brighten dingy floors. Combine half a cup of hydrogen peroxide with one gallon of hot water, then go to town on your flooring. Because it’s so mild, it’s safe for any floor type, and there’s no need to rinse.


16. Help out your plants. To ward off fungus, add a little hydrogen peroxide to your spray bottle the next time you’re spritzing plants.


17. Spray a solution of 1/2 cup water and 1 tablespoon of hydrogen peroxide on leftover salad, drain, cover and refrigerate. This will prevent wilting and better preserve your salad.


18. Sanitize your kids’ lunch boxes/bags.


19. Dab hydrogen peroxide on pimples or acne to help clear skin.


20. Hydrogen peroxide helps to sprout seeds for new plantings. Use a 3% hydrogen peroxide solution once a day and spritz the seed every time you re-moisten. You can also use a mixture of 1 part hydrogen peroxide to 32 parts water to improve your plants’ root system.


21. Helps with foot fungus. Spray a 50/50 mixture of hydrogen peroxide and water on them (especially the toes) every night and let dry. Or try soaking your feet in a peroxide solution to help soften calluses and corns, and disinfect minor cuts.


22. Spray down the shower with hydrogen peroxide to kill bacteria and viruses.


23. Wash shower curtains with hydrogen peroxide to remove mildew and soap scum. Place curtains in machine with a bath towel and your regular detergent. Add 1 cup full strength 3% hydrogen peroxide to the rinse cycle.


24. Use for towels that have become musty smelling. 1/2 cup Peroxide and 1/2 cup vinegar let stand for 15 minutes wash as normal. Gets rid of the smell.


25. Use hydrogen peroxide to control fungi present in aquariums. Don’t worry, it won’t hurt your fish. Use sparingly for this purpose.


What do you use hydrogen peroxide for?

Here are some other uses you may find interesting as well...

1. 2. 3

CLEAN AND DISINFECT YOUR HUMIDIFIER!!!


I love my humidifier! 

I especially love it in my boys room! Did you know that it can help babies sleep peacefully through the night? MAJOR BONUS!

A humidifier can also:
relieve a cold, cough, the flu, allergy, sinusitis, nose bleeds and hay fever.
It can help relieve and prevent dry, scratchy skin.
And improve the air quality at home.

It's very beneficial! But it can't do much if you don't care for it. Bacteria and mold can grow in the tanks, so it's important to rinse out your humidifier daily.

But it's also important to clean and disinfect your humidifier at least once a week. I'll admit it, it's been a while for me...

Always refer to the cleaning instructions for any appliance that are provided by the manufacturer.

What you'll need:


CLEANING!  

1. Unplug the humidifier. Remove the filter and rinse with cold water under the faucet. {Mine needed to be replaced, so I tossed it and added a new one!} Let it dry on a towel. Do NOT use any cleaning solutions on the filter. Chemicals can cause permanent damage to the filter. Toss out the filter once a month and replace it with a new one.


2. Remove the tank. Drain it. Add a generous amount of undiluted white vinegar to the base of the humidifier. Let it sit for 30 minutes. Gently scrub base with a soft bristle brush to remove any build up. Rinse thoroughly!


Disgusting, huh?


DISINFECTING!

Once it's been cleaned you should disinfect the water tank by filling the tank with clean water and teaspoon of bleach or 3% hydrogen peroxide. I prefer the hydrogen peroxide. Gently swish the solution. Let it sit for 30 minutes. Rinse thoroughly!

Tip: use distilled water it will help prevent minerals deposits from building up in the machine.


Remember that this is best done weekly. Some stains were unable to come off because it's been a while since I cleaned this out.

As long as this is done on a weekly basis, your humidifier should stay in perfect working order for a long time!


Happy Cleaning!

GETTING RID OF MOLD!!!


I'm ashamed to show you this...


Not pretty. It makes me sick! I've tried so many different things to get rid of it and nothing seemed to work. Until now.


I am all for going green in cleaning, but sometimes green does not work quite as well.

So, here is what I did...

First, get rid of the mold! {Green cleaning}

BORAX

You can find it, here.

  1. To kill mold using borax, create a borax-water solution using a ratio of 1 cup of borax per gallon of water.

  2. Vacuum up any loose mold with a HEPA filtered vacuum cleaner to lessen the number of spores stirred up into the air during the cleaning process.

  3. Use a scrubbing brush with the borax-water solution to scrub the mold off the surface.

  4. Wipe up any extra moisture and excess mold particles or dust/debris to prevent them spreading into the air once the surface has dried.

  5. You don't need to rinse off the borax as the solution will prevent more mold beginning to grow on the surface again.

  6. Leave the surface to dry completely.


Second, get rid of it's stains! {Not green cleaning}

CLOROX BLEACH FOAMER

You can find it, here.

1. Make sure the area is dry.

2. Spray the foamer on the spot directly. Let it sit. {Keep the windows open and exhaust fan running.} FYI - I let it sit for an hour.

3. No scrubbing. Rinse off with water.

4. Let it dry completely.

If you can still see some mold, give it another go around, but I only needed to do it once.

What products do you use to get rid of mold?

CARPET CLEANING!!!

I've had a bunch of emails since posting my vinegar remedies on exact recipes for cleaning certain things.

Lately, it's been the carpet, hard water stains and dishwashers.

Well, I am going to add to my Let's Clean series over the next few weeks.


Today, I will be cleaning my carpet!


I live in an apartment and I really hate how they all have the lightest color carpet known to man. And most of them will charge you to replace the entire thing for one little stain! This really bugs me!

So, with two little boys and a couple of cats, I am in constant worry.

Here is one of my stains... Don't judge!


 I don't know how long this stain has been here.

It's been under my rug. The rug has not been moved in 3 years.

But I can tell you it's a pet stain.

I love my male cat, but seriously he has issues when we go on vacations.

And here it is now...


Here's the magic recipe!

1. Soak up ANY and ALL wetness.
2. Sprinkle baking soda on the stain, let it sit for 10 minutes, vacuum thoroughly.
3. Mix 1 Tbsp of dishwashing detergent, 1Tbsp of vinegar and 2 cups of warm water. 
4.Using a white cloth sponge the stain with the solution and blot until the liquid is absorbed.
5. Sponge off with cold water and blot dry.
Voila!

Before and After...

{The before was taken when the sun was shining. The after was taken as the sun was setting. I promise it's the same spot!}

CLEANING UP THE DISHWASHER!!!


Next in our series is the dishwasher.

I opted for vinegar. It really is the miracle cleaner. And I try to do all of my vinegar cleaning on the same day and on a day when I can open the windows.

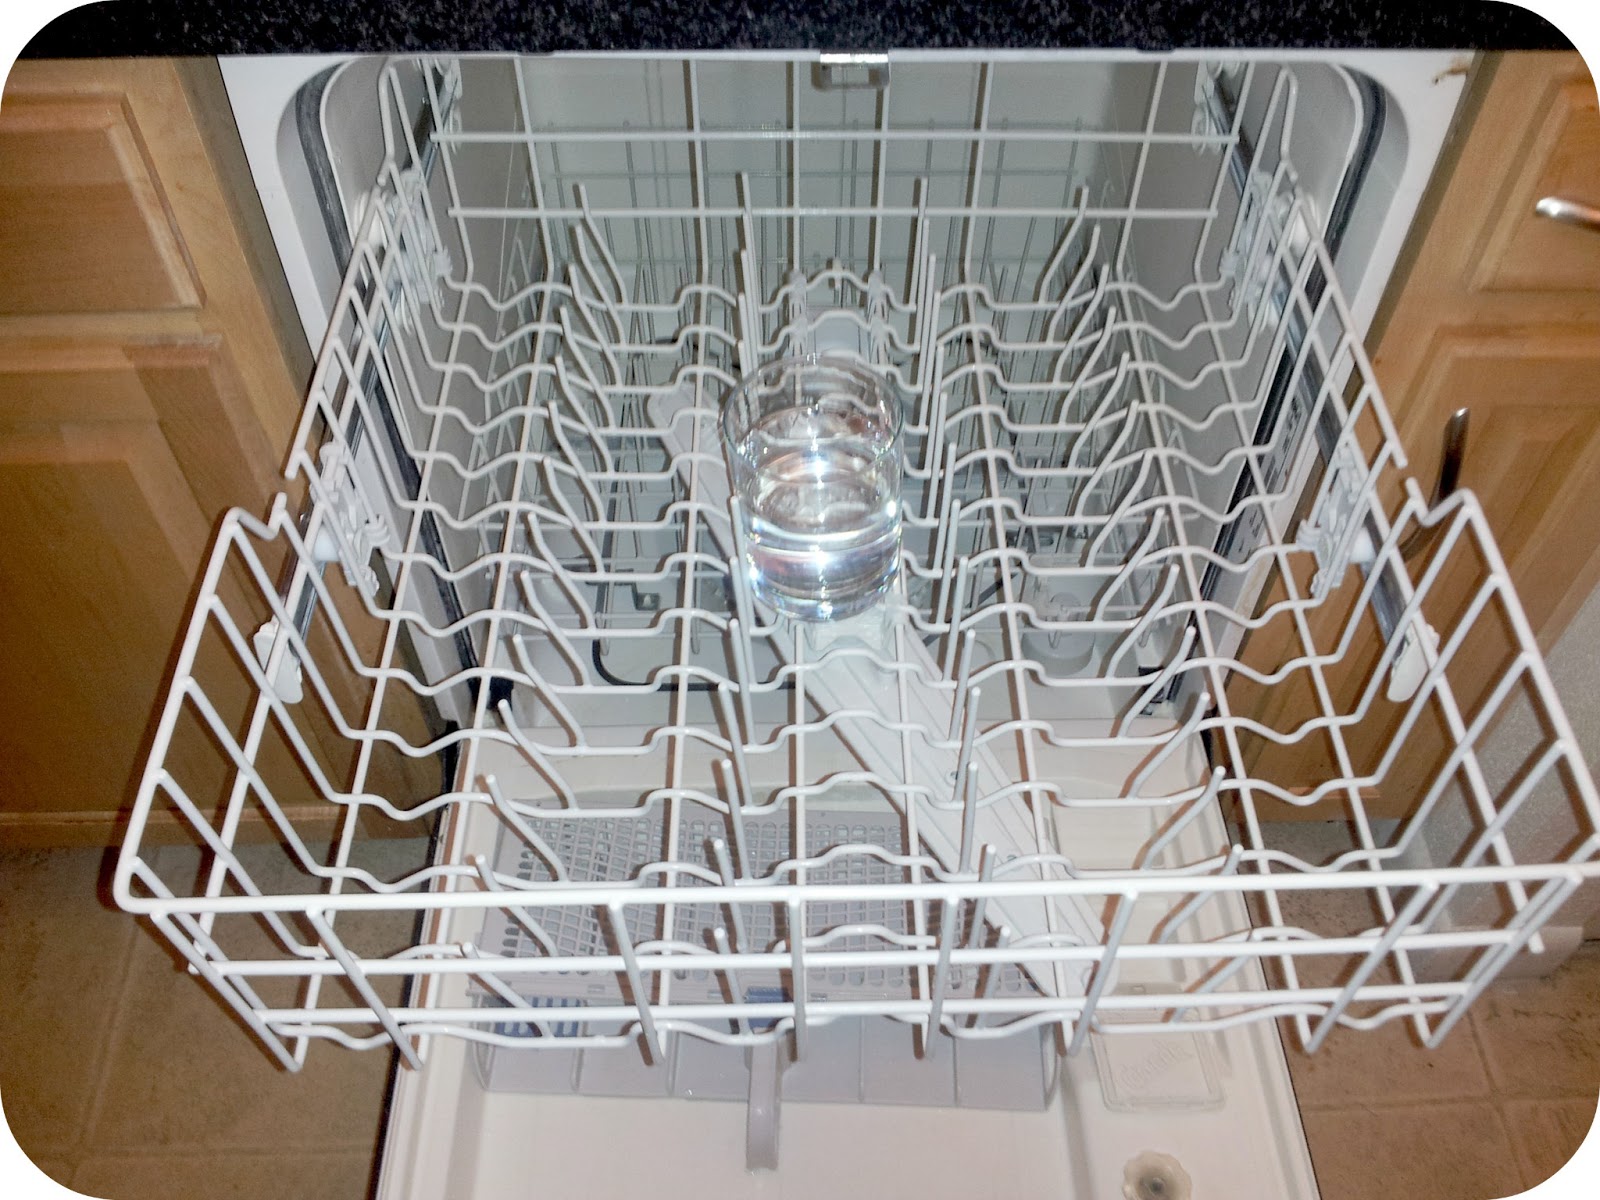
First, pull out the bottom rack and check the base to see if there are any chunks that may be clogging the drain. 


Second, put the bottom rack back in and add a cup of vinegar in a dishwasher safe dish to the top rack. Run it through a normal cycle with hot water. The vinegar helps to loosen the greasy grime and sanitize the dishwasher.


Third, after it's completed take a cup of baking soda and add it to the bottom of the dishwasher.  Run it through a short, hot water cycle. This helps to freshen the smell and brighten the inside of your dishwasher.

Here is my dishwasher before and after!


I realize that the picture after isn't quite as clear, but if you click on the photo, it will get bigger and you will notice the base is a big difference! The water sprayer also has a little less hard water stains.
{That's another tutorial coming up!}

I do this every 6 months.I use the dishwasher every day, so it may not need it as often as you might. It's safe to do monthly and it can really help boost the cleaning of your dishes.

CLEANING TILE AND GROUT!!!


I may or may not have said this before, but I live in an apartment, hopefully not for too much longer!

But, as for now, I do.

The only tile we have in the house is in the entry way.

It's times like this, I wish it was vinyl like the kitchen and baths.

But, it's ok.

I tried some solutions I've seen popping up on Pinterest.

I used Lysol Toilet Bowl Cleaner and Clorox Bleach Foamer.
{with either choice, make sure you stay well ventilated}

Here are the results:


I let them both sit for about 15 minutes and then I just wiped it away. No scrubbing. No muscles used whatsoever!


As you can see, both worked well, but the bleach spray did work a little better!

 
Lysol Power Toilet
Bowl Cleaner


Clorox Disinfecting
 Bleach Foamer


There are a few spots that could use a little more time, but I'm pretty satisfied with how it turned out.

And I don't think the complex will be having any issues with how it turned out.


Tell me, what do you use to clean your grout?

IT'S SPRING TIME!!!

And that means it's time to clean!

I do my deep cleaning twice a year, spring and fall.

This is the time that I clean, declutter and organize... EVERYTHING!

If you asked me, I would say, cleaning is always the first step in this series.

Over the next few weeks, I will be starting my LET'S CLEAN series up again!


I will show you my favorite cleaning techniques for cleaning grout, a microwave & dishwasher, getting rid of hard water stains and mold around the tub.

Once I have shown you these cleaning techniques, I will move on to decluttering & organizing your life with my ORGANIZE ME series. As a mom with 2 young boys, we gather a lot of stuff every 6 months for donations and trash!


I hope you'll stick with me and let me know how it's going for you! I would really love to hear!

WD-40... WHO KNEW?


The history of WD-40


The product began from a search for a rust preventative solvent and degreaser to protect missile parts.
WD-40 was created in 1953, by three technicians at the San Diego Rocket Chemical Company. Its name comes from the project that was to find a 'Water Displacement' Compound. They were finally successful for a formulation, with their fortieth attempt, thus WD-40. The 'Convair Company' bought it in bulk to protect their atlas missile parts. Ken East (one of the original founders) says there is nothing in WD-40 that would hurt you.

WD-40 Uses:
1. Protects silver from tarnishing.
2. Removes road tar and grime from cars.
3. Cleans and lubricates guitar strings.
4. Gives floor that 'just-waxed' sheen without making them slippery.
5. Keeps the flies off of Cows, Horses, and other Farm Critters, as well. (Ya gotta love this one!!!)
6. Restores and cleans chalkboards.
7. Removes lipstick stains.
8. Loosens stubborn zippers.
9. Untangles jewelry chains.
10. Removes stains from stainless steel sinks.
11. Removes dirt and grime from the barbecue grill.
12. Keeps ceramic / terracotta garden pots from oxidizing.
13. Removes tomato stains from clothing.
14. Keeps glass shower doors free of water spots.
15. Camouflages scratches in ceramic and marble floors.
16. Keeps scissors working smoothly.
17. Lubricates noisy door hinges on both home and vehicles doors.
18. It removes that nasty tar and scuff marks from the kitchen flooring.
It doesn't seem to harm the finish and you won't have to scrub nearly as hard to get them off.
Just remember to open some windows if you have a lot of marks.
19. Remove those nasty Bug guts that will eat away the finish on your car if not removed quickly!
20. Gives a children's playground gym slide a shine for a super fast slide.
21. Lubricates gearshift and mower deck lever for ease of handling on riding mowers...
22. Rids kids rocking chair and swings of squeaky noises.
23. Lubricates tracks in sticking home windows and makes them easier to open.
24. Spraying an umbrella stem makes it easier to open and close.
25. Restores and cleans padded leather dashboards in vehicles, as well as vinyl bumpers.
26. Restores and cleans roof racks on vehicles.
27. Lubricates and stops squeaks in electric fans.
28. Lubricates wheel sprockets on tricycles, wagons, and bicycles for easy handling.
29. Lubricates fan belts on washers and dryers and keeps them running smoothly.
30. Keeps rust from forming on saws and saw blades, and other tools.
31. Removes grease splatters from stovetops.
32. Keeps bathroom mirror from fogging.
33. Lubricates prosthetic limbs.
34. Keeps pigeons off the balcony (they hate the smell).
35. Removes all traces of duct tape.
36. Folks even spray it on their arms, hands, and knees to relieve arthritis pain.
37. Florida's favorite use is: 'cleans and removes love bugs from grills and bumpers.'
38. The favorite use in the state of New York, it protects the Statue of Liberty from the elements.
39. WD-40 attracts fish. Spray a little on live bait or lures and you will be catching the big one in no time. Also, it's a lot cheaper than the chemical attractants that are made for just that purpose.
Keep in mind though, using some chemical laced baits or lures for fishing are not allowed in some states.
40. Use it for fire ant bites. It takes the sting away immediately and stops the itch.
41. It is great for removing crayon from walls. Spray it on the marks and wipe with a clean rag.
42. Also, if you've discovered that your teenage daughter has washed and dried a tube of lipstick with a load of laundry, saturate the lipstick spots with WD-40 and rewash. Presto! The lipstick is gone!
43. If you spray it inside a wet distributor cap, it will displace the moisture, allowing the engine to start.

The main ingredient? Fish oil


You can check out their site, WD-40 for more tips! Over 2000!

HOUSEKEEPING!!!

I recently came upon a blog that has some amazing tips for cleaning and organizing! 

You know I'm a sucker for that kind of thing!

As I was soaking up the valuable information here,  I knew that I just HAD to share this with you!

This site had put together 25 Blogs with Advice for Homemakers!

I was super excited to find new sites for Time Management, Organizing, Cleaning, Menu Planning and even a few that will help keep the flame burning in your marriage.

They have some other amazing posts with some great tips!

One of my favorites is 10 Lessons Children Can Learn From Doing Household Chores, found here


Here are the first 3:     
  1. Self-Sufficiency and Independence – When kids learn to complete their chores on their own, without having to be cajoled into doing so by a parent or caregiver or directed in the proper way to do so, they’re also learning their first lessons in self-sufficiency and independence.
  2. A Sense of Responsibility – Children who know that there are certain tasks that must be completed, and that it falls to them to ensure that they’re done well, are learning about personal responsibility. Gaining this understanding during childhood years helps kids grow into more well-rounded, capable and successful adults.
  3. The Knowledge That a Feeling of Accomplishment Accompanies a Job Well-Done – One of the greatest rewards of a job well done is the sense of accomplishment and pride that comes with it. Mastering a task boosts a child’s self-esteem and confidence level, helping her to excel in other areas.

10 Tricks to Make Your House Easier to Keep Clean, found here.


Here are the first 3:

  1. Keep shower doors cleaner with Rain-X.  Start by thoroughly cleaning your shower doors with a glass cleaner.  If the glass is textured, use a Mr. Clean Magic Eraser to get into the glass grooves.  Using a razor blade, scrape off any soap that has caked onto your doors.  Dry the glass completely with a soft towel.  Spray on Rain-X or a product called Aquapel, then wipe the glass clean with a microfiber cloth.  The product leaves a thin coating on the glass which will repel soap and water. The end result is that your shower doors will stay cleaner for much longer. While these products, which can be found in the automotive department at discount stores, are typically used for windshields, they also work great on shower doors.
  2. Squeegee off the walls after each shower.  By squeegeeing off the water and soap after each shower you will limit the amount of water and soap that dries onto your shower walls and doors.  Make sure to dry any water off of your faucet and the metal around the glass on the shower doors to avoid water spots.  This will keep your shower looking sparkling clean.
  3. Brighten cabinets with heat. Over time kitchen cabinets get coated with grease. This happens so gradually that it’s usually not even noticeable.  Microwave a sponge for 30 seconds and then put on some rubber gloves before grabbing the sponge.  Spray the cabinets with a cleaner that contains orange oil.  Use the hot sponge to wipe away layers of grease and grime that have accumulated on your cabinets.  Not only will the kitchen smell like fresh oranges, but the oil will give the cabinets that just like new shine.  The oil will also help to prevent food from sticking in the future.

And lastly, 10 Uses for Bleach for House Cleaning, found here.


Here are the first 3:

  1. Mold and mildew – Bleach is great for killing mold and mildew while whitening at the same time. You can use it on grout, in the shower (including shower curtains and mats) plus to remove mold from cement and exterior paint on your house. Mix with water and let stand for at least 15 minutes before rinsing.
  2. Kitchen – Every household should have a spray bottle of bleach mixed with water to use in the kitchen. You can use it to kill germs on cutting boards and counter tops plus use to clean your kitchen appliances.
  3. Sanitizer – Since bleach is an effective way to kill bacteria, it can be used to sanitize just about anything around the home. Use it to sanitize kids toys, second hand items bought at a garage sale or anything else you touch with your hands to keep from spreading germs.
So, go on over to Housekeeping.org and check out their amazing tips.

CLEANING YOUR PILLOWS!!!

Next up in the Let's Clean series... PILLOWS!


Our pillows collect dust, mold, bacteria, allergens and dead skin cells. Ew. Gross.

"Experts" say you should replace your pillows every 3-6 months!

I'm sorry, but I don't have money to buy new pillows every 3-6 months.


Here are some tips to clean your pillows!

1. Test your pillow. Does it need to be cleaned? Fold the pillow in half. Open it. Does it fluff right back up? No? It's time to wash.

2. You can wash polyester and feather filled pillows the same way. Press out as much of the  air as possible before stuffing the pillow into the washer. Do 2 pillows at a time. Use a mild detergent, if the pillow smells add 1/2 a cup of baking soda, if the pillow is moldy add 1/4 cup of vinegar. Run an extra spin cycle to ensure that all of the fluids are out of the pillows.

Do you have a microfiber or memory foam pillow? Follow the instructions on the pillow.

3. Dry your pillow. Use two tennis balls, preferably in 2 separate socks. The tennis balls get out the remaining fluids. The socks help prevent the yellow from rubbing off on your pillows. Run it on a low cycle. This may need to run through a couple of times. Once completed, take a deep smell of the pillow. Did you smell any moisture? Yes? Run it through again.


CLEANING TIPS AND TRICKS!!!

I've collected some of my favorite cleaning tips and tricks for you!


I hope some of these are new to you!

1. Cleaning glassware -  When you're washing narrow-necked glass vases and decanters, add a little uncooked rice to the water. Your glassware will sparkle.

2. Cleaning glass - Use old newspapers instead of paper towels to clean mirrors and windows. They work great, and you're recycling.

3. Eliminate wax spills - To remove hardened wax from fabric, place a paper towel or a brown paper bag on top of the wax and press with an iron on low heat. The paper absorbs the wax, and your iron stays clean.

4. Keeping the house clutter free - When in doubt, dump it. You'll revel in your decluttered existence and have fewer items to dust.

5. Dusting lamp shades - My vacuum attachment doesn't work on cloth lamp shades, so dust the shades with a lint roller.

6. Speeding through chores - Time flies when you listen to music!

7. Removing food orders - When the plastic storage containers start to smell like the food that was in them, wash them with hot water and two tablespoons of baking soda.

8. Cleaning for guests - If you can clean only one room before company arrives, tackle the bathroom. This is the only room where people spend time solo and may have the time and tendency to notice a mess.

9. Picking Up - Leave a basket at the foot of the stairs and toss in any toys or miscellaneous items that were brought downstairs during the day. Whenever you go upstairs, take the basket with you and unload. It beats running up and down the stairs all day. Although you do miss out on the workout.

10. Stay focused - Do you get very distracted while cleaning, set a timer for 30 minutes. It helps you to stay focused, and you get more done in a short amount of time.

11. Eliminating cat hair - To pick up cat hair, put on a wet rubber dishwashing glove and wipe your hand over surfaces. The hair will stick right to it.

12. Repurposing old clothes - Wear an old, unmatched sock on your hand when you have to dust the house. Run your hand along chair rails, crown moldings, and doors until the sock is dusty enough to discard or wash and reuse.

13. Washing China - Make a paste of baking soda and water to clean discolored teacups and teapots. It's gentle enough for most fine china, and it's easy on the hands and the wallet.

14. Dusting - Use paint brushes to dust cracks and hard to reach places in telephones, stereos, etc.

15. Removing marker stains - Hair spray will remove magic marker stains from any surface.

16. Killing flies -  Hair spray kills flies.

17. Detering roaches -  Place a bay leaf in each of your cupboards, by your windows and doors to keep the roaches away.

18. Crumb-less sofa -  Keep your sofa crumb-free by doing a  weekly under-cushion vacuuming with the upholstery attachment.

19. Well hidden messes - Use cute storage boxes to store USB cables, remotes and chords.

20. Make the bed quickly - Pull the flat sheet all the way up and the blanket two thirds of the way up, then fold the sheet over the blanket and fold the duvet in half at the foot of the bed.  

KIDS CHORE CHARTS!!!

I am a chart/list person.

I LOVE CHECKLISTS!!!!

I always have.

I guess that's why I love cleaning and being organized.

So, my oldest little man is 2 1/2 now. I decided it's time for us to get him chart/list loving too. He already does chores. He cleans up his own toys, clears the dishes off the table (whether you are done or not) and helps with the laundry (he puts the clothes in the washer, knows which buttons need to be pushed to get the load washed and switches the clothes from the washer to the dryer and starts that.)

So, I went in search of some cute charts that would help him stay on task!


Here are a few of my favorites:
 

If you go directly to Sutton Grace's blog, you can download this editable printable!

A Cooking Bookworm

Mighty Mommy

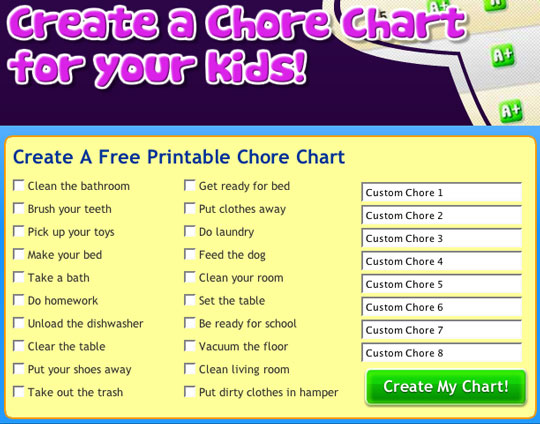
You can even create your own, free chart.

Still need some more ideas? Type in "free kids chore charts template" to your Google search bar and click on images, there are tons!


These aren't chore charts, but I thought they were cute enough to add to his board so he knows what needs to be done in the morning and night.


As with all of my printable posts, please pull the original copy from the link provided. These ladies work hard and deserve 100% of the credit!

PRODUCT REVIEW - RESOLVE SPRAY & WASH!!!


Here's my back story...

My little 2 year old LOVES Hot Tamales... you know, the candy.


Well, a few months back... August to be exact, he decided to climb up on my bed and have a few of these. After he was done, he proceeded to wipe his red, sticky mouth on my clean, white bedding.

I was so upset.

I hate washing comforters, and just thought, "It's red on white, there is no way I will be able to get this off. Might as well start looking for a new comforter."

About 2 months had passed and nothing was screaming at me, 'BUY ME!!"

So, I decided to give it a wash.

Before I washed it I sprayed it with this,


I wish I had taken a picture, I really didn't think it was going to work, I mean the stain was 2 months old, but IT DID!!!

I have no red, mouth shaped stain on my white bedding! It's all gone!

All I did was spray and then get this, wash! :) I didn't have to let it sit for a minute, or 5, or 10, I just stuck it in to wash.

It is clean! I am happy! And this product will be staying in my laundry room for a LONG time!!!
Pin It button on image hover